

WRITTEN BY kyle stockbridge
office administrator OF BOOM BOX POST
There’s a powerful Pro Tools feature I’ve been using more and more in my editorial as of late and after chatting with other editors in the office I’ve realized it’s commonly overlooked. It’s using sync points when syncing your audio in the timeline!
What Is a Sync Point?
Normally, when snapping a clip to a selection or timecode in Pro Tools, you’re aligning the start or end of the clip boundary. We all know (or should know) Ctrl + Clicking an audio clip will quickly snap the head of the clip to the selection… and bonus points for Ctrl + Cmd + Click to snap the tail of the clip. However, if you have a sound like a whoosh, a stinger, a car-by with an exact sync moment within the clip, snapping the head or tail of the clip to your selection doesn’t give us a one-click sync solution. That’s where using sync points can save us the most time.
Sync points let you define a custom reference point anywhere inside the clip to use for snapping to your selection. Instead of trimming or manually offsetting clips every time, you can simply create a sync point once and snap directly to it.
Basic Workflow
The workflow is simple:
Place the cursor on the important sync moment within the clip and click to make your selection.
Create a sync point using Cmd + , (or set a custom shortcut) — this will create a small green arrow at the bottom of your clip to indicate the sync point location.
On the timeline, click on the frame you want to sync your sync point.
Ctrl + Shift + Click the clip to snap it to your target location at the sync point.
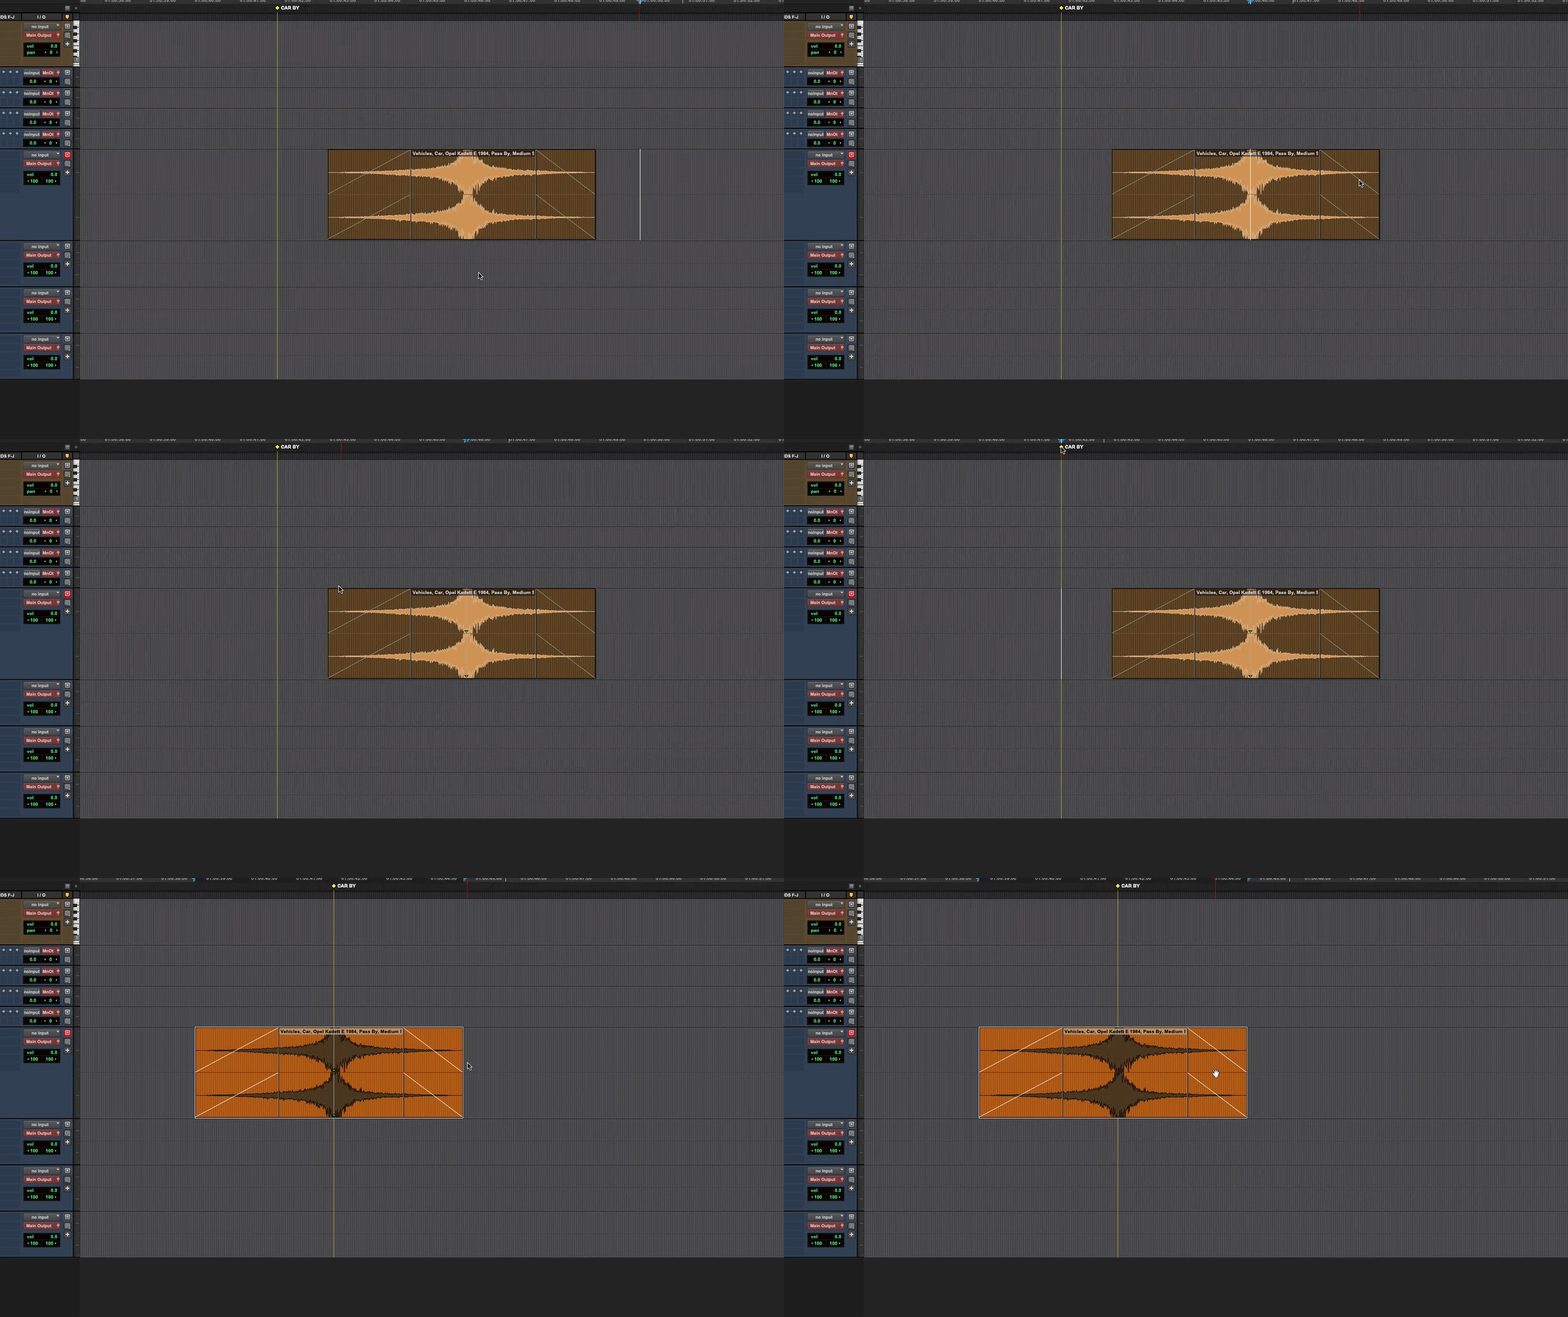
You may only set one sync point per clip. To remove a sync point from a clip, simply select the clip and execute the shortcut again (Cmd + ,) or hover over the sync point with the grabber tool and Opt+Click.
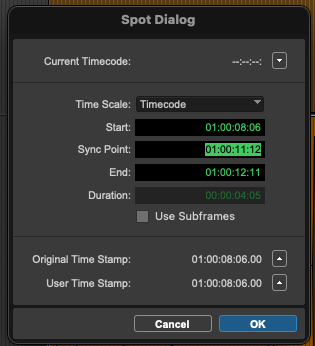
You may also spot a clip’s sync point to a specific timecode. In spot mode, click your clip and enter the timecode into the “sync point” field within the Spot Dialog box.
Practical Uses
I’ve found the sync point workflow the most useful when editing the following:
Transient material such as Impacts, Pats, Hits, Explosions
There is no guessing with transient material like a hit or gunshot—it’s either in sync or not. Manually dragging is perfectly fine for this but when you start to layer multiple sounds there’s no quicker way to get them all perfectly aligned than setting your sync points on each clip and snapping them to the same frame!
Transitional sounds such as Whooshes, Risers, Stingers & Car-bys
Instead of guessing the exact placement of a car passing by on screen and nudging/dragging until it’s right, sync points get it on the first try.
Syncing dialogue to picture
Finding the exact consonant or plosive to sync on screen is a quick and foolproof way of confidently syncing dialogue lines.
Syncing Footsteps
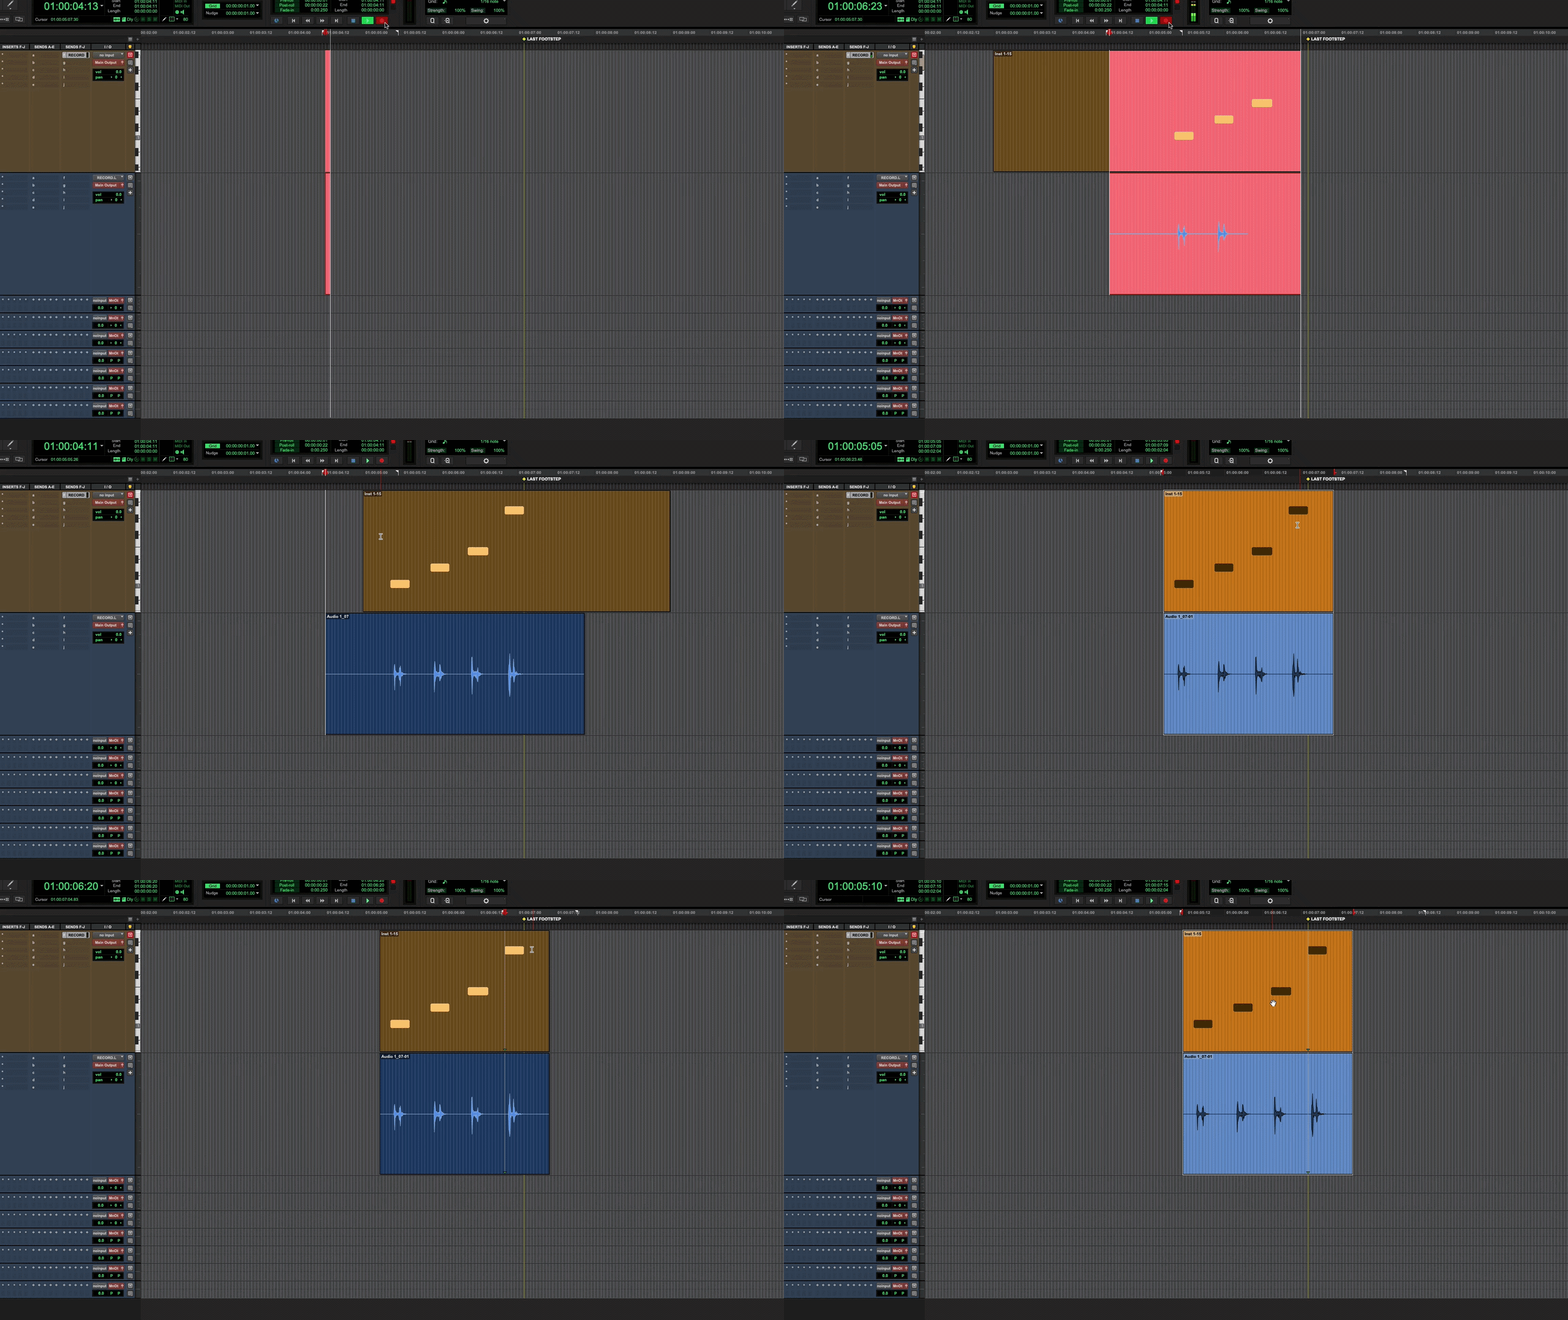
Keep in mind that you can set sync points within MIDI clips as well! Since we often utilize digital foley here at BBP, here’s my sync point workflow for footsteps:
Walk/Record in the MIDI to picture
Tab to the specific MIDI note/footstep I want to sync (for example, the last footstep in the sequence)
Set the sync point with Cmd + ,
Make a selection at the specific frame the last footstep lands on screen
Ctrl + Shift + Click the MIDI clip to instantly sync the footstep
It’s a small feature, but one that can speed up day-to-day editing quite a bit once it becomes second nature! Instead of trimming clip heads or dragging and nudging regions into place manually I find that sync points sync my audio in fewer steps, which over the course of a whole edit can save me valuable time. Thanks for reading!
If you enjoyed this post, check these out:
Lunch And Learn: Digital Foley Hacks For Kontakt And Other Samplers
Two Simple Workflow Shortcuts To Help Save Time!
Step-By-Step Audio Post-Production Workflow