

WRITTEN BY Kyle stockbridge
office administrator, BOOM BOX POST
We hope you all had a wonderful winter holiday break and New Years celebration! As those of you Angelenos already know, we experienced an uncharacteristically long rainy stretch to ring in our New Year here in California. As ready as I am to be on the other side of this rain, it does provide a great opportunity to pull out the field recording gear and add some new rain recordings to my personal library. As I was cleaning up my recordings, I felt compelled to start putting them into context with other layers which progressed into experimenting with some simple but effective rain designs. This blog post will share what I learned in the process!
Take a listen to the example rain design build below!
Kidding, this is actually just bacon on a frying pan. We can do better, but it may be fun to experiment with cooking recordings as layers!

Gathering your layers:
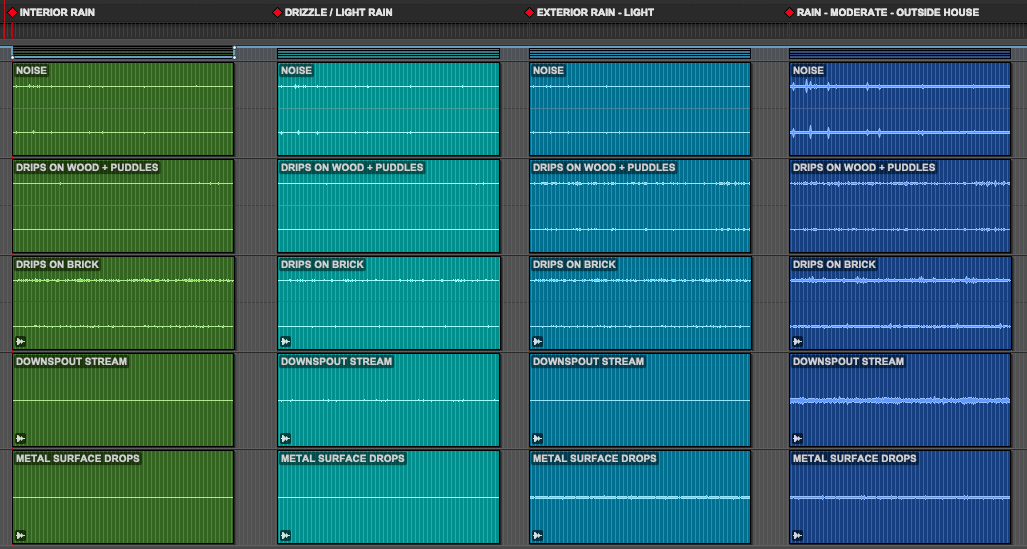
As with any build, it’s important to consider the visual and narrative clues from the scene you’re given and how it informs which layers you’ll need for the build. Layers is the key word here: if you only slap on a single rain recording, it’ll most likely end up sounding like white noise. This will often sound flat, static, thin and potentially distracting. What we’re aiming to create is a sense of dimension, movement and textural depth to immerse us in the scene. I’ve broken down my layers into four categories for this build:
1) Air/Atmosphere
This will be the washed out, softer focused layer that provides the atmosphere and that sells the idea that it's raining. This will be more of a noise layer that aims to capture the space for us to build upon.
2) Surface(s)
Depending on what your scene allows, find recordings with rain droplet impacts that match the surfaces in your scene. It sounds obvious, but an exterior rain scene in a neighborhood or city will have a much larger variety of surfaces than say a rural meadow. Find recordings of rain impacts on surfaces like foliage, wood, metal, etc to create the variation.
3) Unique Elements
Think of individual elements that may or may not be visibly present in the scene such as storm drain flow, downspout outflows, pings on patio furniture, puddle splashes, roof runoff etc. This will add more character and help to accurately tell the story of the scene.
4) Perspective Layers: Close-miked and Distant
Combining close miked recordings, distant washed out recordings and your unique layers from #3, panned around the sound field will create a much more immersive rain design!
Mixing your layers to communicate different raiN styles and densities
Once I’ve gathered a collection of layers I feel are sitting nicely together for the scene, simple leveling greatly impacts the overall feel of the weather conditions. Using the same 5 field recordings, I experimented mixing different level combinations. The different mixes of the layers can help communicate different perspectives and different environmental characteristics, however I found that the most effective way to change the sense of rain density (drizzle vs downpour) is simply the overall level of the build.
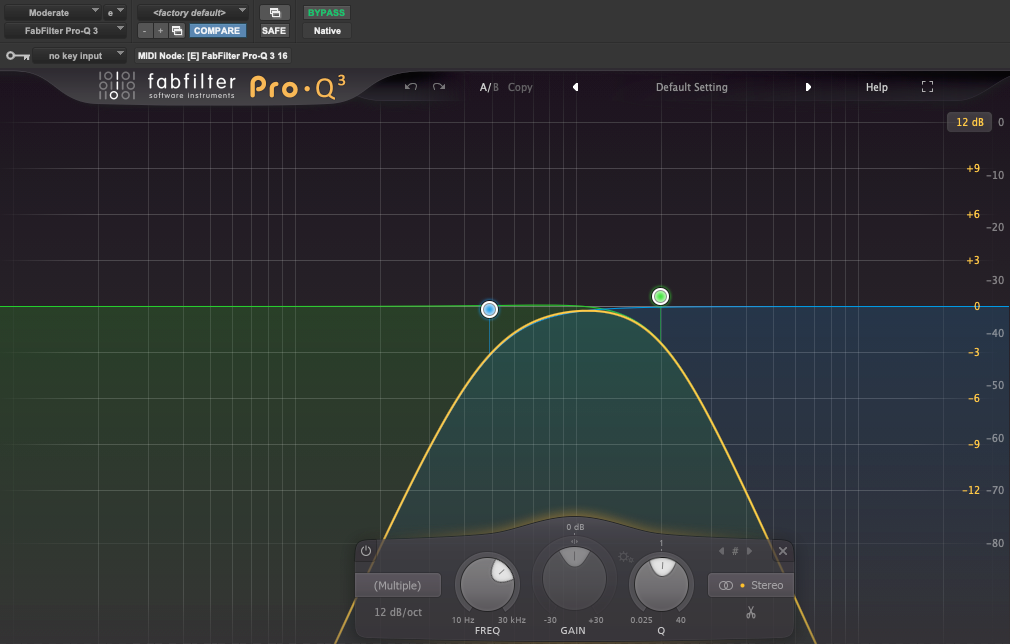
Using a simple EQ and lowering the overall level can effectively change the perspective from exterior to interior. You can always sweeten this with layering some rain recordings from the interior perspectives as well.
One last example of a build I made that includes the same layers from above but with the addition of water features such as streams, creeks, fountains, pouring water onto brick, etc. This is the heaviest density of the builds:
Conclusions
Using these different densities can create very impactful tonal shifts in your story. Lighter rains will lend a calmer and more intimate tone where as heavier density rains can elevate the chaos of the story. Throw in some thunder cracks to really heighten the chaos!
I really enjoyed this exercise of recording, layering and leveling these rain sounds to communicate different styles of rain. I found that if you have good ingredients and an ear for leveling, it doesn’t take much to immerse the listener in different environments. Hope you enjoyed this post and stay dry in the meantime!
If you enjoyed this blog, check out these:
DESIGNING A SPACESHIP LASER BEAM
AN UNDERWATER RECORDING ADVENTURE
DESIGNING A NON-TRADITIONAL MOTOR