

written by Kyle Stockbridge
Office administrator, Boom Box Post
We’re big fans of template workflow here at Boom Box. Whether it’s a simple folder structure template (check this post Jeff Shiffman wrote some years back), or a 100+ track count Pro Tools template – frequently working from what you’ve already built saves so much time.
Our editors not only work from series-specific templates, but also food group-specific (sfx/foley/dialogue/backgrounds) templates. These Pro Tools templates are set up by our sound supervisors and mixers and feature different track groupings and layouts according to the series’ needs. More than saving the time of having to build out the session every time, it ensures consistency across the editorial team and allows for seamless assemblies come time for mix.
But what if we could save even more time by adding our own personalized starting point preferences to these templates? One way is by taking advantage of Pro Tools Window Configurations! During your editorial or mixing process, do you typically arrange your plugins and windows in a specific way? Well what if, no matter which template you’re working from, your window layout loaded up the same way without having to reconfigure from scratch? Let’s break down how to set this up.
But First: Create A Master Template
One important thing to note about Pro Tools Window Configurations is that they’re saved within the .ptx session. For this reason, we recommend first setting up your window configurations and then creating a Pro Tools template. This way, every session you create using the template will have your window configurations ready to go.
Arrange Your Windows
Start by opening your favorite AudioSuite plugins, meters, edit windows, etc. and position them where you like on your screen(s). Below are two examples (although you’ll need to set these up one by one): On the left I’ve set up my commonly used plugins for sound effects editorial, while on the right I’ve set up my configuration for dialogue editorial. I love the idea of setting up a configuration for each specific food group of sound editorial, or for mixing.
Note: I tested toggling between various configurations with up to 7-8 AudioSuite plugins and experienced pretty low latency between load-up times. However, your results may vary.

SFX editorial config example
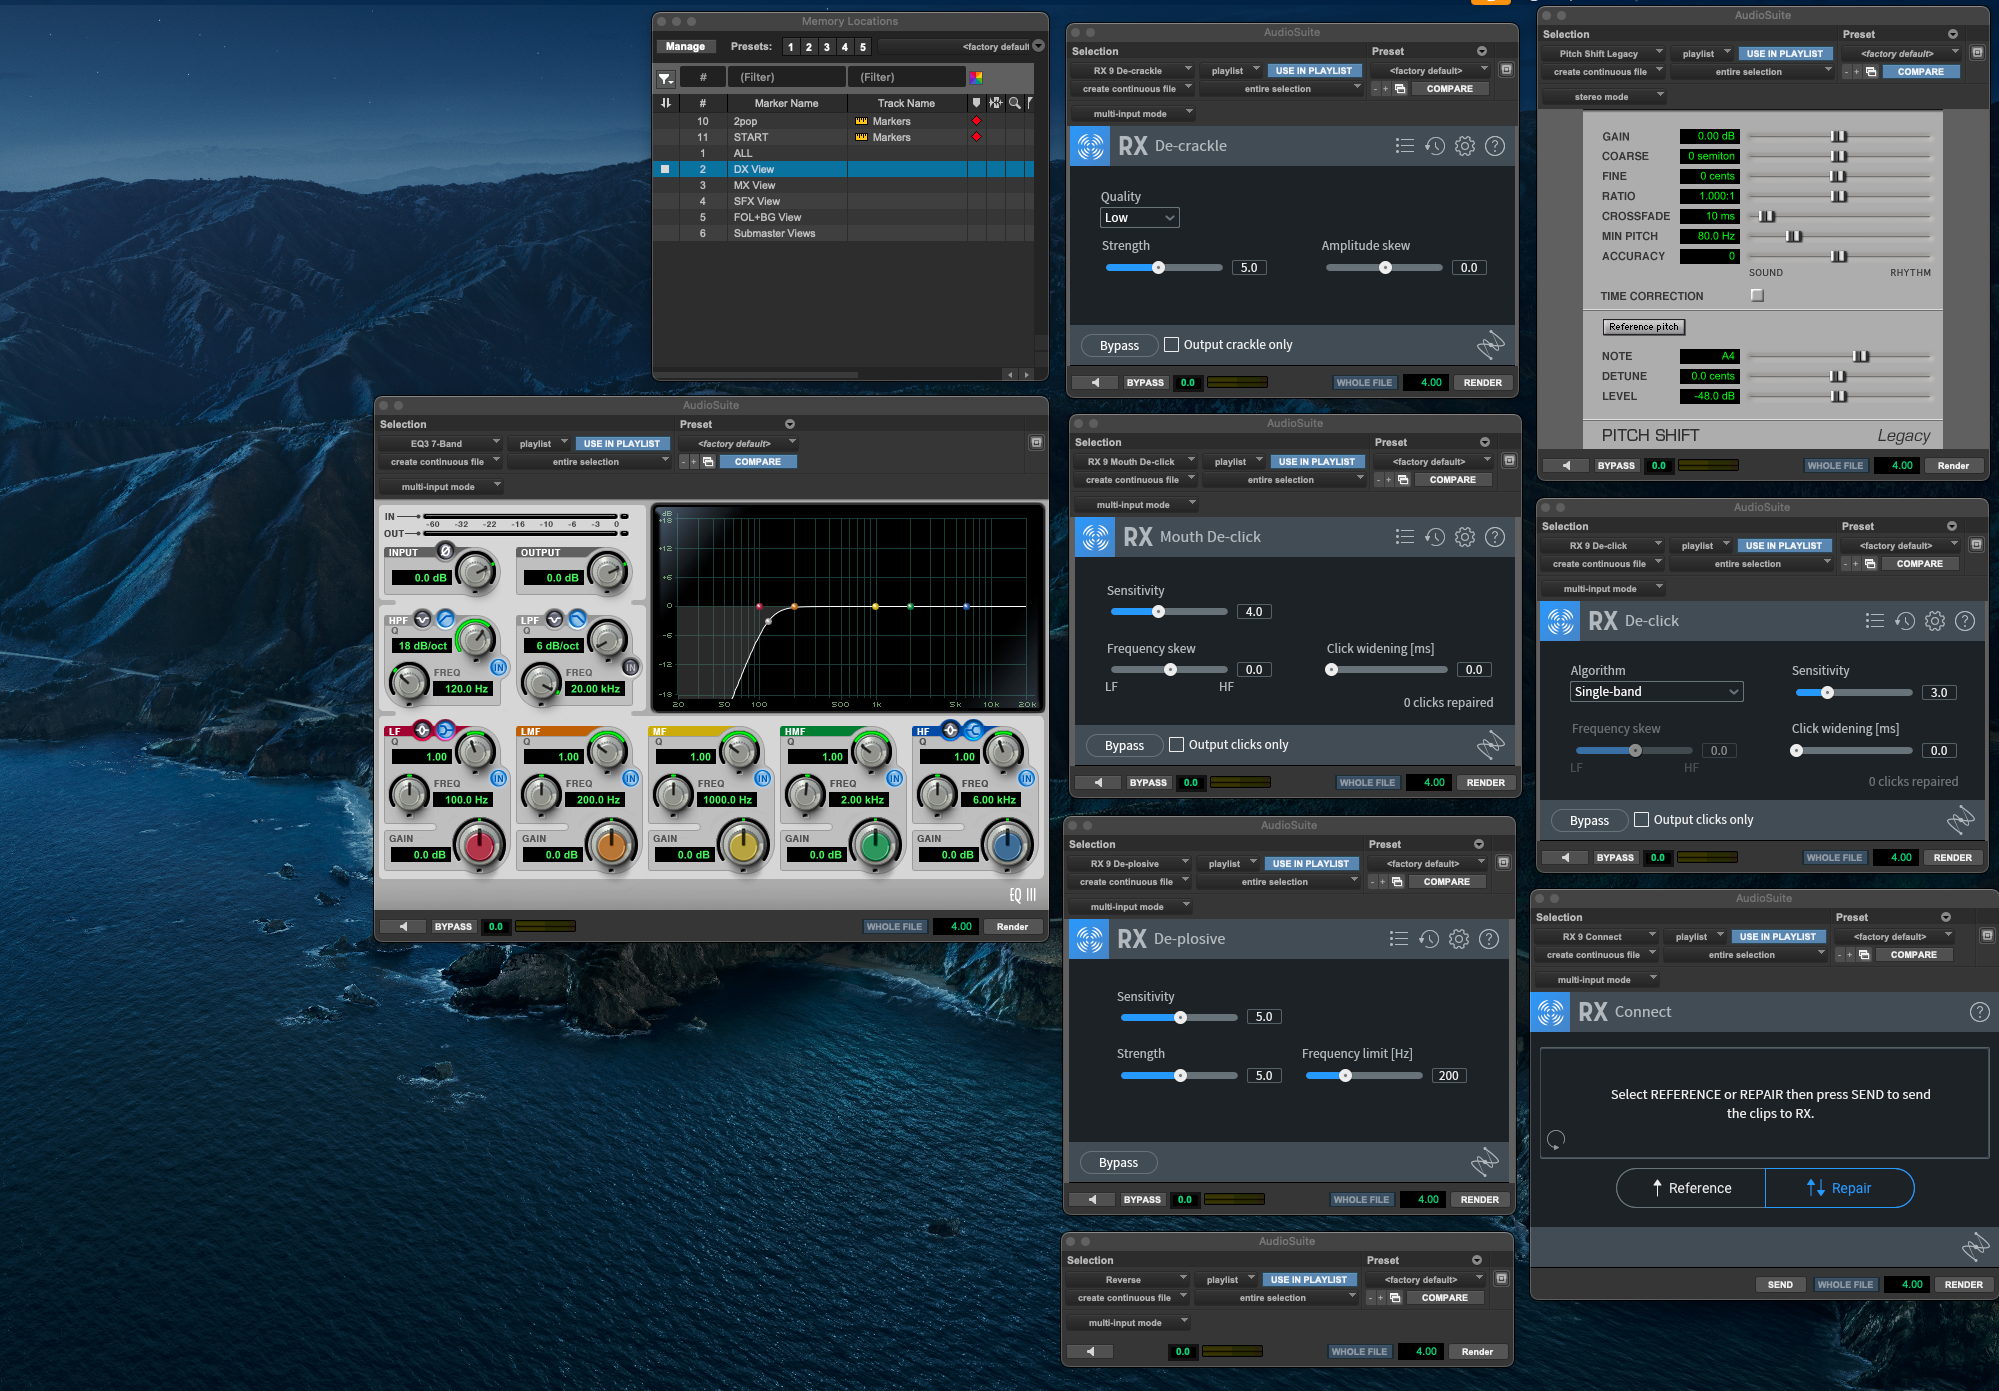
DX editorial config example
Store your new Configuration
In the ProTools menu, go to Window > Configurations > New Configuration…. A dialog box will appear where you can choose what to capture (mix/edit window layouts, plugins, transport, etc.).
Name and Save – Give your configuration a descriptive name (example: “DX Cleanup” or “SFX Editorial”) so you’ll know exactly what set of plugins it recalls.

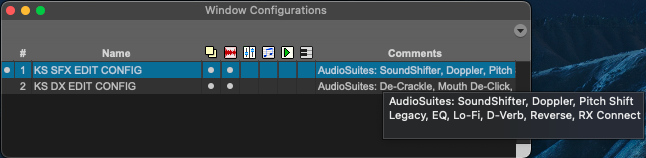
Pro Tip: leaving a comment for each configuration can be useful in the future after you’ve saved many iterations of different configs.
3. Recall Instantly – To bring a configuration back, either open Window > Configurations and select it from the list, or Pro Tip: use the numeric keypad shortcuts (period + number + asterisk). When you save your configs, the number (top left in the above image) you assign will be the same number you press when using this shortcut.
4. Take this one step further by tying your configs to memory locations! (Check out the bottom paragraph of this blog post for a refresher on track views and memory locations!) By tying specific configs to specific views, you can effectively toggle between different sets of tracks and plugin/window arrangements to quickly switch between your editorial tasks.

One last thing to note: If you need to update a configuration, navigate to Window > Configurations and select Update Active Configuration. If you find yourself frequently updating a specific Window Configuration while you’re working, you can select Auto-Update Active Configuration.
Create as many configurations as you wish! It’s a small investment of time that pays off by saving time every workday. Instead of re-arranging plugins or reopening windows every time you start a new project, you’ll already have everything in place and ready to work.
Thank you for reading! I hope this inspired you to start mapping out new window layouts for your next project!
Share how you use your templates or window configs in the comments!
If you enjoyed this post, check out these similar posts:
TWO SIMPLE WORKFLOW SHORTCUTS TO HELP SAVE TIME
SET YOURSELF UP FOR SUCCESS WITH THESE WORKSPACE TWEAKS
HOW TO USE MARKERS FOR SOUND EFFECTS EDITORIAL