

WRITTEN BY JACOB COOK
SOUND EFFECTS EDITOR, BOOM BOX POST
Dynamics processing is valuable for many kinds of audio work. Compressors, Limiters and Transient Shapers have become so ubiquitous that you would struggle to find a piece of recorded music, film or television show where one of these tools was not used. These processes have applications for the sound editor as well, allowing you to control dynamics in your own recorded sound effects or beef up a key element in a build for a big moment. In this basic overview, I’m going to talk about a specific plug-in for the three types of processing mentioned above, but the principles discussed here can apply to any manufacturer’s software, or even hardware tools.
COMPRESSORS
Compression is a highly misunderstood topic, partly because it is often confused with file compression, the stuff the takes our nice .wav files and turns them into lossy and controversial .mp3s. Audio compression is a completely unrelated topic. A compressor is an amplifier that reduces gain based on a set of specific parameters. The most important are the threshold, attack and release and ratio. The threshold determines the signal level at which the compressor applies its reduction, and the attack and release determine how fast after reading that signal level the compressor is applied and releases. The ratio determines the amount of gain reduction. You can apply these parameters in a LOT of different ways, but most commonly you would use a compressor to decrease the dynamic range of a signal.
I’m going to use a few very dynamic sounds as examples throughout. First, let’s look at a tom drum.

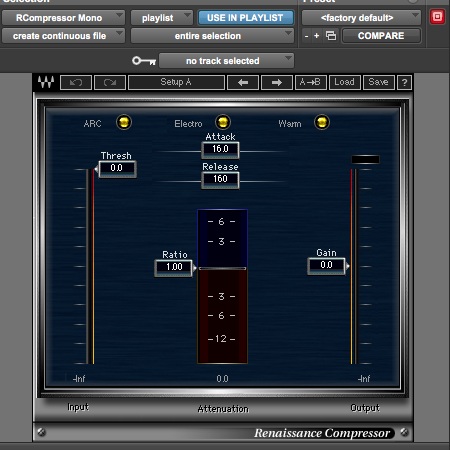
The raw sample as a strong attack and a nice round tail that shows the character of the drum. I’ve decided that I think the attack of the tom is too harsh and loud compared to the rest of the signal so I’m going to apply a compressor. For this post, I’m using Renaissance Compressor from Waves. In this extreme example, I’ve set a very short attack, low threshold and high ratio of compression, meaning the compressor will trigger at a low level, turn on very quickly, and apply a lot of reduction.
Basically it will lower the loud transient at the top of the sound, bringing it closer to the level of the tail, as you can see in the image. This also has a noticeable effect on the sound.

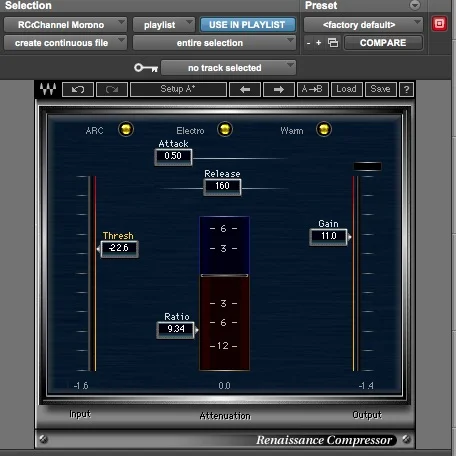
Let’s try the same processing on a sound effect. This is a rock impact sound effect that’s extremely dynamic, it has a very loud transient and a softer tail.
I’m going to use almost the exact same compressor settings to try and level it out, and bring out more of the tail and texture of the rock sound.

You can easily hear the difference and see it in the waveforms. Unlike the tom example, this doesn’t seem overly processed to me, and shows the stony character of the tail in a nice way. I could see using the processed sample as a punchy alternative, a fatter sound could stand out where the short transient of the original might not. You can also use compressors to increase dynamic range. By dialing in a slower attack with a high ratio, you can cause the compressor to clamp down just after the initial transient, reducing the tail of the sound. I’m not going to show examples for that here, but I’ll touch on another way to accomplish that when I cover Transient Shaping.
Limiters
Limiters have a lot in common with compressors. Like a compressor, a limiter reduces gain that exceeds its threshold, but unlike a compressor, it prohibits signal from exceeding a given level entirely, like a wall for loud signal. This is why you often hear the term “brick wall” when referring to limiters. This has a number of really useful applications. You can use it to strictly enforce an upper signal level limit on mixes for example, but you can also use it to quickly and easily reduce dynamic range of a signal, just like the example above. Limiters often include control over the threshold, ceiling and release, which are all similar to the controls on the compressor.
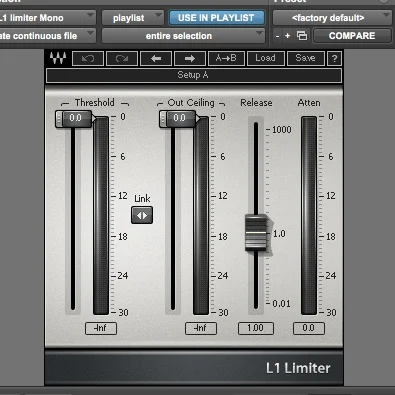
Let’s take another pass at our tom drum sample. As before I’m applying a pretty extreme amount of limiting, you can see we are peaking at around 16db of gain reduction on the plug in. this is readily apparent when you listen to the processed sample and look at the new waveform.


The waveform really does appear to be “brick walled” as the limiter has completely stopped the sound from exceeding it’s ceiling. I’m now going to hit the limiter even harder for our rock sample.

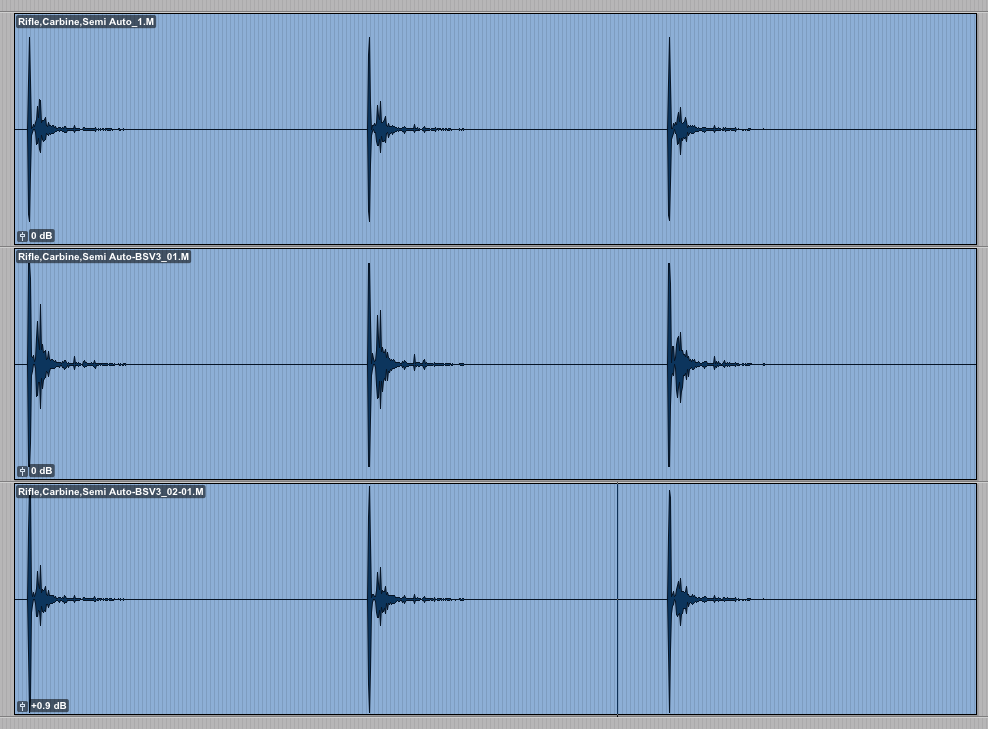
You can hear and see that the limiter has had a similar result as the compressor, but allows us less control over the final sound. However that hard upper limit has a lot of uses. Let’s try on one of the most dynamic sounds in the library, a gunshot.

Gunshots have extremely loud transients, and depending on the recording can often have very subtle tails and texture. Raw recordings often require processing to get punchy and exciting, like the highly compressed samples we hear in action movies. You can see and hear that this sound has a lot of dynamic range. It also sounds like there might be some limiting happening already, probably from the recorder when the sound was captured. I’m going to apply some extreme limiting to reduce the range and hopefully give some texture to the initial shot.

The initial attack is now softer relative to the tail and the elements just after. It’s also brought out a bit of the texture of the mechanical components, which is nice. However this is a pretty extreme amount of processing, and I would not normally advise hitting recordings this much. A compressor with more nuanced control would be better fitted for this type of processing.
Transient Shapers
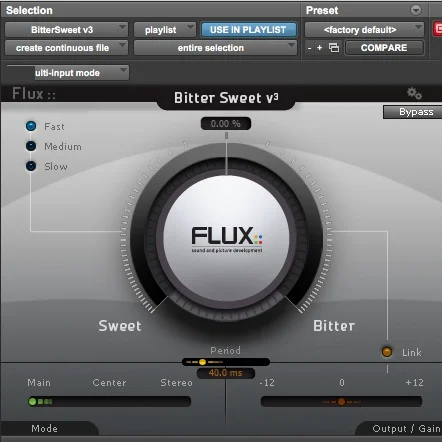
Transient Shaping is like a secret weapon of sound engineers everywhere. It can accomplish similar goals as a compressor, but often in a simpler and nicer way. Transient Shapers simply allow you to control the relationship between the transient and the tail of a sound. This makes them extremely popular for percussive elements. Often they include controls for attack and decay, but my favorite: Flux’s BitterSweet , simply includes a big knob measuring from Bitter, dynamic and transient heavy, to Sweet, leveled out with more tail and less transient.
Let’s apply BitterSweet to our good ‘ol tom sample.

You can see and hear a pretty pronounced difference in the samples. The Sweet version features a lot of that nice round tail, while the Bitter version has a lot of attack, and less tail than the original sample. Let’s see what it does to our Rock recording.
The results are much less extreme than what we did with the limiter, but still achieve a similar goal. The transient on the Bitter sample is especially sharp. Here’s the same setup with the gunshot.
Again, the results are much less extreme than our limiter example, but really showcase the different sound the Transient Shaper gives you. This tool is great for getting more texture out of sharp impact sounds, such as gunshots, slaps and drums, or getting sharper transients out of a less aggressive sound.
Ultimately dynamics processing can be an extremely helpful tool for sound effects editors. It can take lackluster sounds in your edit or library and give them new life or help them punch through the mix. It is absolutely worth experimenting with these tools, but they are best used more subtly than the extreme examples presented here. For further reading, check out these articles:
https://theproaudiofiles.com/dynamics-processing/
https://www.izotope.com/en/blog/mastering/multiband-compression-basics-izotope-mastering-tips.html