

WRITTEN BY JEFF SHIFFMAN, CO-OWNER OF BOOM BOX POST
This is not the sexiest blog post you will read this month. In fact, it’s probably the least sexy topic we’ll write about all year here at Boom Box Post. That said, it’s such an important one for anyone considering themselves a professional sound editor. A cluttered file structure is the equivalent of a messy home. Sure you can make do sorting through a mess, finding what you need after some intense searching. but why put yourself through it? Go to the container store, buy a pack of labels and some bins and get your stuff off the floor (I’m still on the messy house metaphor). So with that in mind, let me be your personal Peter Walsh (he is a professional organizer - I had to google it) as I help you to get your digital life in order.
The Problem

A desktop this messy is all too common in post production.
Lets start simple here with a cluttered desktop. Whenever I see an editor with dozens of loose files littering their screen, I sense trouble. And it’s not just limited to the desktop. Any messy folder can be toxic. It’s an issue of cleanliness for sure, but deeper than that it’s a productivity issue. As soon as you pull a file in to a Pro Tools session, a link is formed. You can choose the Copy option upon import but now you've doubled your file storage. And can you be positive you'll always remember to choose that option? When it inevitably comes time to delete files from your desktop or other folders, I for one would be afraid of breaking my projects with missing files. This can snowball fast and you'll end up with a mess.

Missing audio files can grind your work to a halt.
Improper organization can become a client problem too. It’s extremely common for clients to reach out months, even years after finishing a project for changes, updates, reference files, etc. Without a solid organization plan in place before starting a project, it’s nearly impossible to maintain confident backups.
The Solution
So how did we get into this mess? The main problem I run into is one of excitement. Picture arrives and you just want to get started being creative! Me too!! Having a system in place as a part of your every day workflow can save you time on both the front and back end of a project so you can indeed get creative almost immediately.
I use a solution I like to call the Template Folder system. In short, you build yourself a detailed folder structure that is utilized on every project you undertake. By always working within the same folder framework, you will always be familiar with where your media live. We teach this system to every intern at Boom Box Post and although simple, it never fails to blow their minds. The key here is to not only create a system based on your personal needs, but to always implement it, no matter the size of your project. I promise you that if you stay diligent and follow these steps, you will never have to worry about file organization again. Ever. Maybe I’m the only one who loses sleep over this?
Follow These Steps
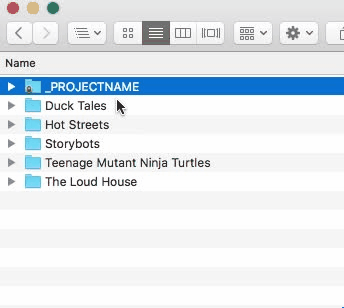
- Create a folder with a generic name wherever your projects typically live. I suggest “PROJECTNAME"
- If you work on one off projects (film for example) this will suffice
- If you work in episodic content (like television), create a folder nested within this folder named PROJECTNAME_000”

Start every project with a simple pre-planned nesting folder structure and save yourself setup time and the possible frustration of searching for missing media.
- Within your “PROJECTNAME” folder (or your “PROJECTNAME_000” folder for episodic) you’ll want to create subfolders to hold all of your media*, your editorial sessions a final backup of your mix session and your deliverables. As a starting point, I suggest creating the following subfolders:
- Deliverables - All final deliverables sent to your client/supervisor
- Design - Sessions specifically created for sound design work
- Dialogue - Dialogue sessions/elements
- Foley - Foley record sessions and editorial
- Mix - A final copy of the re-recording mix session (all audio files copied)
- Music - Music deliveries/elements
- Assembly - Assembly/Preview sessions, bringing together all elements for the final mix
- WIP - Work in progress. This folder will contain your spotting session and any editorial sessions
*Picture (video) files are the exception here as I keep them on a separate hard drive to maximize computer performance.
Once you've built your file tree, it's a good idea to lock the original template folder so you can not overwrite without unlocking the new copy.
Now that you’ve built your Template Folder, for every new project you'll first duplicate this folder. Next unlock the duplicate and rename the folder with the name of your project.
Duplicate the template folder and rename at the start of every new project.
If you work in episodic content, after renaming the global PROJECTNAME folder, going forward you will simply duplicate and rename the PROJECTNAME_000 with the same project name and a new number for each new episode.
A Step Further To Maximize the Benefits
SAVE TIME
Create your own personal sound editorial template (generic enough to for the start of any project) and nest this inside the WIP folder. No more hunting around for a template or creating a new one from scratch for every project. It’s right there waiting for you!
SAVE HARD DRIVE SPACE (with that, save money) AND TIME
If you follow this system religiously, you should be able to safely choose the link files option when importing audio files or importing session data in Pro Tools. Since all the relevant media for your project is nested in that global project folder, you can choose this option with confidence and save yourself file copying time as well as precious hard drive space.
SAVE EVEN MORE HARD DRIVE SPACE*
Eventually you are going to want to back up your projects and clear them off your rig. When a project mix is concluded, make a habit of selecting all unused files and choosing the remove option. Then save your session into the “Mix” folder using the Save Session Copy In option and be sure to check the box for Audio Files under Items To Copy. If you do this correctly, you will you have all the media you utilized (and only the media you utilized) in that single session. When it comes time to clear space, you can safely delete all the other folders for that project.
*let me stress here that this last step is one you need to be completely confident in before deleting anything.
Of course, you can always pick and choose what you back up based on your preference. The folder structure will again help you keep it all straight. For example, I also like to back up my “Design” folder as that’s usually where anything super cool I have created lives.
None of this is rocket science but adopting this system can speed up your productivity immensely with very little setup time. And it will only grow more useful as time goes on as it works best when evolving organically with your workflow.
This structure works well for me as a supervising sound editor and may also work for editors that have a ‘soup to nuts’ workflow covering everything from spotting session to delivery. Other editors may never touch music deliveries for example and would rather hone the folder structure down a bit to simplify things. At any time you are at liberty to add/subtract folders, alter templates, or customize the file tree in any way to fit your own needs. The key here is to do what works for you and to stick to it. The beauty is that any changes you make to your Template Folder will carry forward for all future projects.