

WRITTEN BY KATE FINAN, CO-OWNER OF BOOM BOX POST
We've all been there, right? You're setting up a home studio, and notice that although you finally have all the right gear, your room is sounding less than optimal. Clap once, and you hear a ping-pong of reverberations that make your ears recoil and your heart sick. So, you look up acoustic panels to purchase only to find that they're priced for princes.
Indeed, truly well-made acoustic panels are expensive, and they should be. There are plenty of cheap alternatives online, but anything that has all the right ingredients (real acoustic-grade 4" insulation, fabric with a good acoustic performance rating, a sturdy frame) will cost you a pretty penny. So, you start to think about just making them yourself. You google and google, but there is no one resource that just tells you how to do it.
My husband and I have been through this again and again each time we move. A new space means all new acoustic problems. We made our first set of panels five years ago. We had just moved into a loft (our first of several), and had decided to put our studio in a small square room that had originally been an alcove, but to which the previous owner had added an entire wall made of glass. Let's just say it was "splashy." So, we cobbled together all of the info we could and made twelve panels and four bass traps (okay it was seriously splashy) on the cheap. It took us hours upon days of combing gearslutz and every other forum we could think of to find one small trick here and another pro tip there. These first panels were not pretty, but they were functional. And each time we moved, we refined our design, took them apart, and made them better (funds permitting, with better materials). For our last loft, which was completely open, we even added two clouds with a self-devised pulley systems for hanging from extra high ceilings and a movable gobo affixed to an industrial pipe stand to create a back wall. In short, we got seriously industrious.
Recently, we moved into our first house (yay!) and, of course, immediately began building the studio of all home studios. Thus, we are back in acoustic panel construction mode.
Since we have spent the last five years pulling together information (and pulling out our hair wishing there was just one place that it all lived), I thought I would give you what we never had: a concise guide to building acoustic panels for your studio. In this post, I have given an exact list of what you'll need with links to purchase everything online, given you my best advice on where to source your materials should you choose to get scrappy, and advice on where to skimp and where it's best to shell out the dough. Then, I have listed step-by-step instructions on our latest incarnation of acoustic panels. We are about to embark on this new versions ourselves, so please feel free to share any suggested modifications in the comments below. Finally, at the very bottom of the post, I added pictures of each item you'll need aside from the lumber which you will need to source from an actual store (see SOURCING YOUR MATERIALS) with prices to give you an idea of the overall project cost.
There is a lot of information in this post, but I hope that you will bookmark it and keep it safe if you're not up for reading it all right away. Trust me, at some point, this will save your sanity.
The Acoustic Panel Plan
My husband and I devised this plan using SketchUp. Note that the top and bottom parts of the frame go over and under the sides. This is key.
This is a shot of our new home studio which is currently under construction. You can see two of the 2'x4' acoustic panels hung on the wall and two 4'x4' clouds hung from the ceiling. Please excuse the mess and the intense shadows in this photo. We are about to embark on wiring our own electrical outlets today, so I used a work lamp to light this picture.
What You Need
Materials
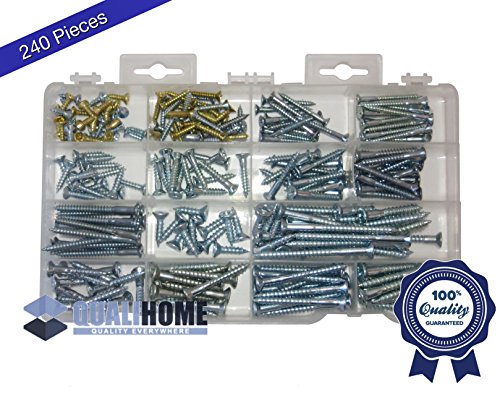
- 2 - 1" x 5" x 8' common boards
- 8 - wood screws
- 1 - 4" panel of Owens Corning 703 acoustic insulation
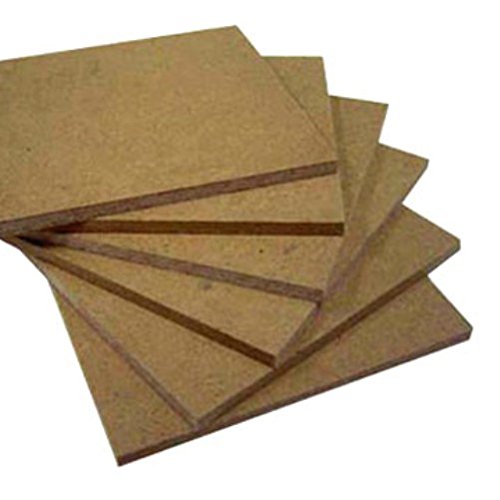
- 1 - 1/4" x 2' x 4' medium density fiberboard (MDF)
- 1 - set of 1/4" offset clips (8)
- 1 - piece of acoustical fabric measuring 3 1/2' x 5 1/2'
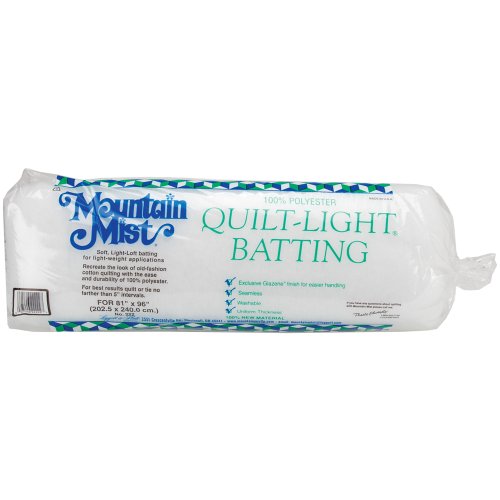
- 1 - piece of light polyester batting measuring 3 12' x 5 1/2'
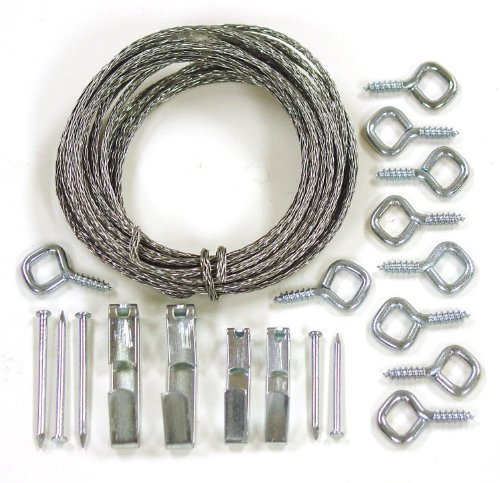
- 1 - picture frame hanging kit
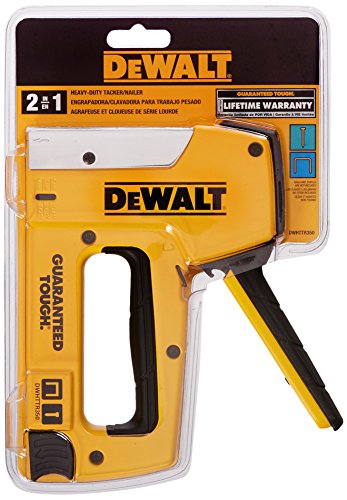
Tools
- electric drill/driver
- hand saw (or miter saw, if you're fancy)
- staple gun
- scissors
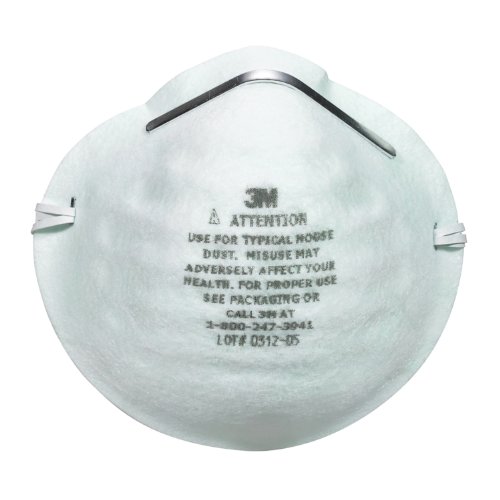
Safety Gear
Sourcing Your Materials
In the lists of materials, tools, and safety gear above, I've included links to Amazon for quick ordering. If you're anything like me, it takes you way longer than you would like to admit to wander the many aisles of your neighborhood Lowe's or Home Depot. And, let's be honest, who has time for that? I must admit that it is a life goal of mine that some day I will be able to just walk in and move directly to the right aisle and then to the checkout line. Someday.... In the meantime, save yourself the hassle and just add these items to your Amazon order for the week and chill out watching past episodes of Game of Thrones while waiting for them to show up.
However, the links represent the top-notch choices for materials, and those might not be right for you at the moment. Luckily, there are plenty of ways to get scrappy and shave a whole lot of money off your panel construction costs if you have the time to source either slightly different materials, or these same materials from local sources. Here's my best advice when it comes to that:
1" x 5" x 8' Common Boards
I provided a link to Home Depot for these so that you can see the exact specs of what I'm talking about. But, as far as ordering, it says that they are neither available to ship or at my local store (Los Angeles). With these heavy materials, you will want to avoid shipping and simply go to your local Lowe's or Home Depot instead. If they do not have 1" x 5" x 8' common boards in stock, you should be able to find 1" x 6" x 8' common boards instead, which are a more common purchase. Both Lowe's and Home Depot will cut your lumber for you free of charge, so ask them to trim them to your 1" x 5" x 8' spec, and while you're at it, you could ask them to also make your other cuts for you (see CUT THE WOOD below). Simply find the cutting station, press the button, and wait for someone to assist you. Keep in mind that sometimes they are reluctant to cut a lot of pieces for you--after all, they aren't trying to do your home improvement project for you--so be considerate about how many pieces you bring to the cutting station.
Acoustic Insulation
When buying your acoustic insulation, Ownens Corning 703 is the only way to go. You will need 4" of insulation for these panels, which means you can buy it in 1", 2", or 4" pieces and layer as needed. Above, there is a link to Amazon which is actually a pretty good price. But, there are a few other ways to get this acoustical insulation at a better price. First, if you live in an area that has a lot of people building home studios, you may get lucky if you scour Craig's List. Sometimes people buy multi-packs and then only need a few and want to offload them cheaply to whomever is willing to pick them up.
Another route to take is to call your local home insulation installation company. We bought ours from Viking Insulation. They were kind enough to order it for us, and we picked it up directly from them, which meant there was no need to pay for shipping.
Acoustical Fabric
When it comes to acoustical fabric, Guilford of Maine is the best of the best. They have excellent acoustic performance ratings, and their fabrics are stunning. Again, the Amazon link provided above is a pretty great price. However, you can use other fabrics that are available at your local Jo-Ann Fabric & Craft store (or other fabric store). You are looking for fabric that has a very loose weave so that it does not cause any sonic reflections. The very cheapest options for loose-weave fabrics are muslin and burlap. We used muslin on our first set of panels (because burlap is honestly just really ugly), and from an acoustic standpoint it worked perfectly fine. However, muslin does have some drawbacks. It is fairly transparent, rips easily, and can be difficult to upholster smoothly. We did not use the batting on our first round of panels, and I believe that all of these problems would have been solved by that addition.
Note that the materials list says that you need 3 1/2' x 5 1/2' of fabric and batting per panel. In reality, your frame requires exactly 3' x 5' of both, but I have given you three inches on each side of the fabric as leeway in stretching and to cover the extra volume created by the batting. If you feel absolutely certain that you can upholster your panels with no errors, feel free to cut pieces just slightly larger than 3' x 5', which may save you money depending on the width of your yard of fabric. However, do no blame me when you realize your fabric doesn't quite stretch far enough, and you need to cut a whole new piece.
Light Polyester Batting
Batting is the fluffy layer used on all upholstering to give soft corners, help the fabric to lie smooth and flat, and to protect the fabric from tearing due to contact with the wooden frame. It will do the same for you on your acoustic panels. Again, the Amazon price in the link above is hard to beat, but you can find this at your local craft or fabric store. However, if you purchase locally, be sure to get thin quilt grade rather than thick upholstery grade batting. This will keep your panels looking sleek and professional.
You can skip the batting all together to save money, but at around $6 for a roll, I would suggest that using it may save you money in replacement costs down the line. If I were going to cut costs, I would use the batting, but buy a less expensive fabric rather than skip the batting step.
The Back of Your Panel
These instructions include adding an MDF back to your panel. Having a back is important so that your insulation does not release fiberglass particles into your work environment. Keep in mind that adding an MDF back is the cheapest and easiest solution (which is why I ultimately decided on it for this panel plan), but it does decrease the potency of your panel. The best solution from an acoustic standpoint is to upholster the back of your panel with fabric. If you choose to make that modification to this plan, be advised that you will need to affix your hanging apparatus in a different manner.
Tools
A word about tools: it's fun to have tools. It's an amazing feeling to know that in your garage you have all of the items you would need to make anything. But, let's be honest, you probably know someone who has all of these items--even a miter saw. So if you want to do this cheaply, call around and ask your friends to borrow their tools. It may take some time and gas mileage to collect them from various people, but you'll save a lot of money.
Building Your DIY Acoustic Panels
Step 1: Understanding the Dimensions
First things first, it is important to understand that the standard way everyone refers to common board sizes is not exactly indicative of their measurements. In fact, a 1x5x8 (as it's commonly called at your nearby building supply store) actually measures 3/4 inch x 4 1/2 inches x 8 feet.
The second important thing to note before we begin is that your insulation is 2 feet x 4 feet. You do not want to get involved in cutting your insulation since doing that will release a ton of tiny fiberglass particles into the air. Believe me, you do not want that. These tiny fiberglass bits can pierce your eyes, get under your skin, and wreak havoc on your respiratory system. Furthermore, when handling your fiberglass insulation, it is best to wear a mask over your nose and mouth, safety glasses, and heavy duty gloves. I can tell you from experience that having these tiny slivers of fiberglass under your skin is not a pleasant experience.
Because you are not going to cut your 2' x 4' piece of insulation, that means that the interior of your wooden frame will need to be exactly 2' x 4'. So, the total dimensions of your wooden frame's exterior will be slightly larger.
Step 2: cut the wood
First, you will cut the wood for the sides of your frame. To do this, measure exactly four feet down the length of one of your 1x5x8 common boards (remember that in reality this measures 3/4 inch x 4 1/2 inches x 8 feet). Make a pencil mark that extends the full width of the piece of wood. Use your saw to cut along this line. Now you have two pieces of wood that each measure 3/4 inch x 4 1/2 inches x 4 feet. These are your sides.
Next, you will cut the wood for the top and bottom of your frame. To do this, measure 2 feet 1.5 inches down the length of your remaining 1x5x8. Mark this line with a pencil mark that extends the full width of the piece of wood. This will be your first cut mark. Next, measure another 2 feet 1.5 inches down the length of the same piece of wood from your first cut mark. This will be your second cut mark. Use your saw to cut the wood along these lines. You should now have two pieces that are 2 feet 1 1/2 inches in length and 3 feet 9 inches of extra wood. Set the extra wood piece aside for a future project.
step 3: assemble the outer frame
Now, you have two pieces of each length of wood. The two pieces that are 4 feet in length are your sides and the two pieces which are 2 feet 1.5 inches are your top and bottom. Now, lay out your frame so that it is ready to assemble. When fully assembled, the shortest side of your wood pieces (3/4 inch) will face outward toward the room.
Use your electric drill to drill two pilot holes into what will be the top of the top piece 3/8 inch in from the outer right edge and 1 inch from the front and back. Make sure that the pilot hole is noticeably smaller than the wood screw you plan to use. If you are unsure which drill bit to use, it is always best to use a smaller one than you think you need and work your way up to the right size. If you make too large of a hole on your first try, there is no going back.
Once your pilot holes have been drilled, use your electric screwdriver (by changing the drill bit to a screwdriver bit) to insert a screw through the pilot hole and into the right side piece of wood.
Next, fit the left side piece (4 feet in length) below your top piece. Repeat the drilling of pilot holes and insertion of two wood screws as noted above . These should also be 3/8 inch in from the outer left edge and 1 inch in from the front and back of the top piece of wood.
Then, fit the bottom piece (2 feet 1.5 inches in length) below your left and right side pieces. Use the same method to attach it with two wood screws each on the left and right sides. You now have a wooden frame that measures 2 feet x 4 feet on inside and 2 feet 1 1/2 inches x 4 feet 1/2 inches on the outside. See the drawing above for a good look at what the assembled frame will look like.
STEP 4: ADD THE BACK
To add the back of your panel, begin by placing the frame on the ground. Then, attach two of the 1/4 inch offset clips to each side of the top of the frame (top, bottom, left, and right), equidistant from one another, pointed toward the interior of the frame. Keep in mind that the purpose of these is to keep the MDF back 1/4 inch inset from the rear side of the frame. So, they will attach so that they look like a step down into the panel frame. Do not attach them so that they stick out above the frame.
Once the offset clips have been screwed into the frame, flip it over and insert the 2 feet x 4 feet piece of MDF into the frame.
STEP 5: INSERT THE INSULATION
For this step, you will want to wear your protective gear: heavy gloves, safety mask, and safety glasses. Take your frame and insulation package outside. Remove the insulation from its packaging, and insert it into the front of the frame (the side without the MDF back). If you are using 2 inch pieces, insert two. If you are using 4 inch pieces of insulation, you will only need one.
step 6: wrap the frame with fabric
As mentioned in the SOURCING YOUR MATERIALS section above, you will have the best results if you use a layer of light polyester batting between your frame and your fabric. The batting helps to smooth the upholstery and keep the wooden frame from tearing the fabric. Lay the batting on a table, then lay the panel upside down on top of it (with the MDF back pointing up at you). Center the panel on top of your cut batting, then pull a small section tight around the frame, staple it into place on the back of the frame. Continue to do this as you move from the left side to the right side, then the top and then bottom of the panel, creating neatly creased corners when you reach them. Don't wrap them like a present, but instead tuck the corner under so you achieve a crease exactly at the corner. When you have finished and you have checked the front of the panel to be sure that it is smooth and tight, cut off any excess batting of with a pair of scissors.
Now, you are ready to complete the same process with your fabric. Lay your fabric out on the table and place your frame on top of it with the long sides matching up with the long sides of your cut fabric. You need exactly 3 feet x 5 feet of fabric to cover the frame and staple it on the back side. However, you have three inches of extra length on each side so that you can have a margin of error if necessary and to allow you to folder over the back edges to make a clean seam.
Begin by pulling the right side of the fabric tight over the right side of the frame. You should have 3 inches extra. Fold this under and begin stapling the fabric to the back of the frame, starting about 1/4 of the way down the side and moving down until you reach the bottom, pulling the fabric tight and folding the edge under in small segments as you go. Then, return to the top and continue to fold the fabric under and staple it while pulling taut until you reach the top.
Now, move to the left side of the frame. Begin again about 1/4 of the way down the side and pull the fabric as tight and straight as possible. Again, fold the extra fabric under while pulling taut in small segments and staple as you go. When you have reached the bottom return to the top portion, making sure to smooth the fabric so there are no gaps or creases and continue to fold and staple until you reach the top.
Follow these instructions again on the top and the bottom, tucking the top and bottom corner fabric under to make a clean crease exactly at the corner. Once finished, turn the panel over and check to be sure that there are no creases or sagging areas on the fabric. You should have no extra fabric to cut since you have been folding the excess under as you go.
step 7: prepare the panel for hanging
Now, you will use your picture frame hanging kit to prepare your acoustic panel to be hung. Follow the instructions in the package and insert the eyelet screws about 1/3 of the way down from the top of the panel, inside the frame. This is why we left 1/4 inch of depth empty behind the MDF back.
Attach the eyelet screws, the attach the included picture wire, making sure to twist the ends according to the package instructions (in a tight noose-like wrap, not a loose twist). Make sure that when you pull the picture wire taut with one finger as if hanging it from a hook, your finger should be about two inches from the top of the frame.
You have now completed your first DIY acoustic panel for your home studio!
acoustic Panel MATERIALS


HARDWARE

TOOLS


SAFETY GEAR


QUESTION: DO YOU HAVE ANY SPECIALS TIPS, TRICKS, OR MODIFICATIONS TO THIS PLAN THAT YOU WOULD LIKE TO SHARE? PLEASE POST THEM IN THE COMMENTS BELOW.