

WRITTEN BY KATE FINAN, CO-OWNER OF BOOM BOX POST
When Plugin Alliance asked me to try out Unfiltered Audio's newest plugin, SpecOps, before it was released to the public, I was excited. I love having the opportunity to try out new sound design tools and maybe even give valuable feedback to the maker pre-release.
So, I began as I always do, by reading the manual. You may prefer to watch a YouTube user video, or read a blog post (hopefully, like this one!), but I’ve always been a manual gal. I love to know every last detail about how to use a new piece of software before I try it out.
Well, this manual’s first sentence is “SpecOps is the ultimate spectral processor.”
Bold statement, right? I was a bit skeptical. I like my manuals to be fact-based, and this seemed like a pretty hyped up opinion. But, after digging into it, I can honestly say that it stands up to the hype. It is the ultimate!
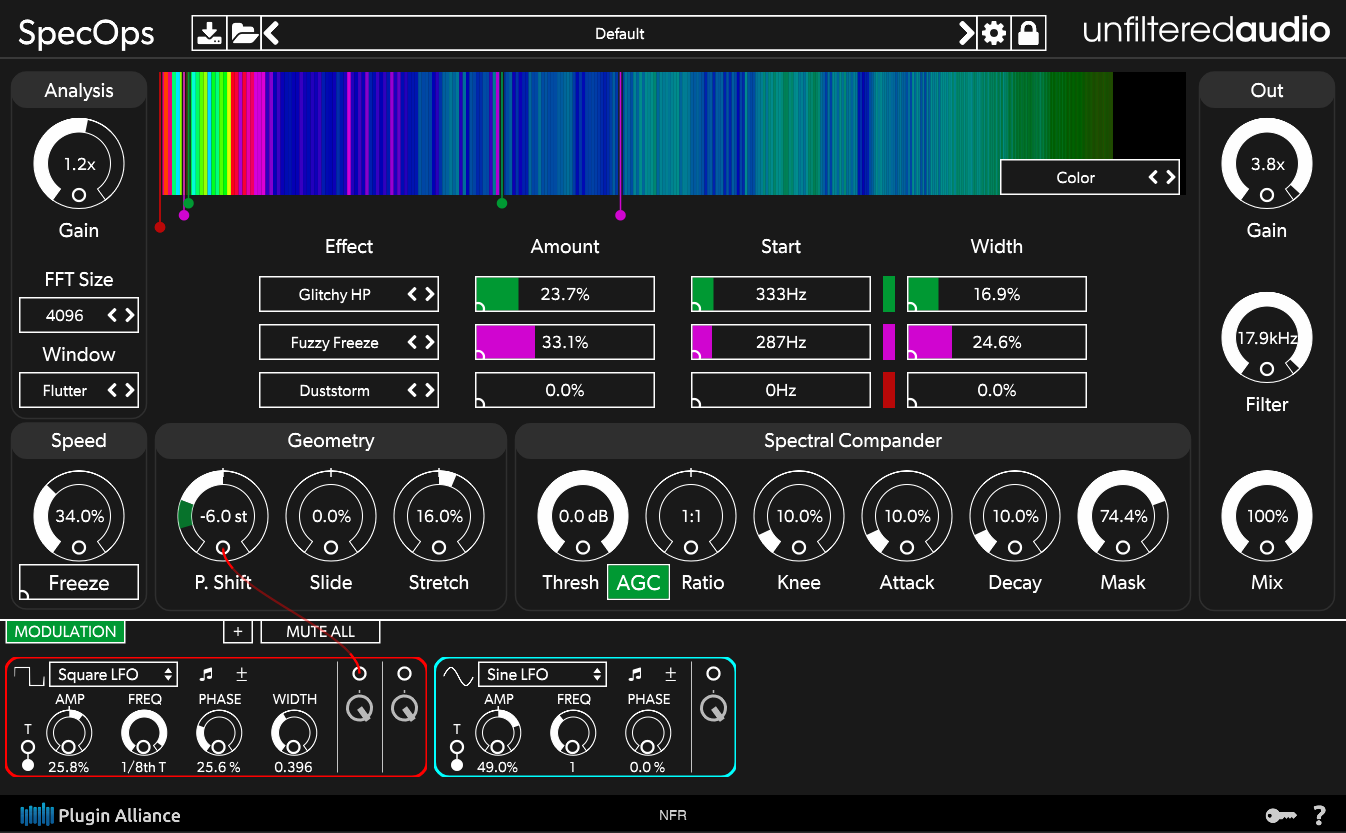
The SpecOps Plugin by Unfiltered Audio
The Basics of Spectral Analysis
To understand how spectral processing works, and therefore how SpecOps works, you must first understand overtones. (If you’d rather skip the science and read about the plugin, just move on to The Basics of SpecOps. Don't worry, I won't be offended.)
A sine wave is the simplest of audio waveforms. It contains no overtones, just the pure fundamental frequency. We’ve all heard a sine wave--it’s that blah tone that you hear as a two-pop or in your bars and tones. So, what’s the difference between a sine wave and, say, the sounds of an oboe? Harmonics. Harmonic overtones are the small amounts of integer multiples of the fundamental frequency which are present in any musical instrument’s sound. Although we register the pitch of the note to be that of the fundamental frequency, these added harmonics help to give a sound its timbre, or sonic “color.” With the help of harmonics, our ears can distinguish between a violin and a trumpet playing the same note.
Inharmonic overtones are non-integer multiples of the fundamental frequency. In music, these can be found largely in percussion instruments like xylophones, chimes, and cymbals.
Anytime we perceive a sound to have a different timbre than a sine wave, these overtone series are present: whether that’s in a car horn, a whispered voice, or a cricket chirping down the street.
When the Fourier transform is applied to a sound, a mathematical equation is used to separate out each overtone, and each one of these frequencies (and their corresponding amplitudes) can be plotted on a graph. Without my man Joseph Fourier, your multi-band EQs, Izotope RX, and all spectral processors would not exist.

Spectrogram of a Violin
This spectrogram shows the harmonics of each note played by a violin player in the recording below. A graph like this is made possible by Fourier Analysis. The overtone series, seen here as integer multiples of each note, are harmonics. Each harmonic gives that particular note it's timbre, or color.
The Basics of SpecOps
As a spectral processor, SpecOps uses the Fourier transform to analyze your input signal. That means that it breaks the signal down into all of the frequencies it contains. You can then apply speed changes and pitch shifting, sliding and stretching to all frequencies. After that, the signal goes into the three effects generators which, in series (one after another), affect selected frequency bands only. From there, a compander applies dynamic processing to each frequency band. After that, an inverse Fourier transformation takes place (also called Fourier synthesis or analysis), where the separate frequency bands are combined back again to create a new signal. To that new signal, you can add a low-pass filter, and final mix it with your original signal, if desired.
This is the SpecOps signal flow diagram. Notice that all processing is done in series.
Key Features
SpecOps contains 36 spectral effects.
A multi-mode spectrograph shows how each effect alters the signal.
Spectral companders apply dynamic processing to each frequency group individually.
SpecOps integrates Unfiltered Audio’s awesome patchable modulation system.
Sound Design with SpecOps
Presets
I’m a fan of starting my exploration of a plugin by trying out a few of the presets. It’s like dipping your toe in the lake before diving in. I found it a bit difficult to locate the presets on this particular plugin. So, be forewarned that they live in the wide rectangle at the top of the plugin with <> on either side, and the word “Default” in the middle. For some reason, that just did not jump out at me. But, after clicked around a bit, I found some pretty hip options that were already built in. I used a few monster vocal recordings that we made here at BBP last year to demonstrate the power of a few presets.
Monster Hiss
Monster Screech
Whistle Hum
Designing My Own Presets

After following the signal flow diagram through all of the sections of the plugin and sampling it's capabilities via the presets, I was ready to dive into doing some design work myself. This is where it got really fun.
Analysis
I started in the analysis section. I chose to keep my input signal at 1.0x gain (no change) to start with. I stuck with the stock 1024 FFT Size. This parameter controls the number of samples used for frequency analysis. The higher the number, the better the accuracy. But, as you go higher, you'll also see an increase in latency and a decrease in rhythmic accuracy (more applicable for musicians using SpecOps).
I then chose the "Flutter" window option. The different types of windows will drastically change how each effect in this plugin alters the sound. Note that if you're getting any fuzziness in your sound, you should try switching from the "Clean" option to "Glitch."

Speed
The speed control adds feedback between frequency analysis frames. This decreases the rate that new spectral analysis occurs. I set my speed to 34%. "Freeze" locks the current frame, making it impossible for new analysis to take place. Clicking this button is equivalent to setting your speed to 0%.
Geometry
This section includes three pots, all three of which leave the signal unchanged when at 12 o'clock. The first knob is "Pitch Shift." This applies a harmonic pitch shift to the original signal, and uses semitone increments. The second knob is "Slide." This applies an inharmonic frequency shift to the signal (see above for the difference between the terms "harmonic" and "inharmonic"). The third knob is "Stretch." This applies compression or expansion to the spectral bins. I chose to slightly alter the pitch shift and stretch parameters for my preset.

Effects
The fourth processing unit in SpecOps is the Effects section, and this is where the fun really begins. Everything up until this was kind of like necessary housekeeping. But, this is where the sound design madness kicks in.
The Effects section allows you to choose three different frequency bands and process them separately with your choice of thirty six preset effects. First, under "Start," you choose the frequency at which you would like the effect to be first applied. Then, you choose a "Width," which allows you to control how many frequency bins are affected. Then, you can choose the amount of effect applied. And finally, you choose your fave preset effect!
The available effects are are split into six categories: filters, mixing, geometry, freezers, effects, and glitchers.
I chose to use two effects and applied them at 3.8kHz and 82Hz.

Spectral Compander

In case you've never heard the term before, a compander is just a compressor + expander. Unlike your typical compander, SpecOps applies a unique compander to every single frequency bin. The larger your FFT size, the greater the number of companders you will have running simultaneously (hence the greater lag time...). This section has all of the usual suspects as far as controls: threshold, ratio, AGC (activate to add makeup gain based on the threshold and ratio settings), and Knee (changes the severety of the gain curve).
Now, you might think that adding the same settings to every frequency bin would result in the same thing as applying it to everything at once. But that is not the case. For example, when you set the threshold, you'll be setting the decibel level at which each frequency bin's individual compander becomes active. Since each bins will have have different loudnesses according to their place in the harmonic structure of the sound, they will trigger the compander at different times. The same holds true for each of these controls.
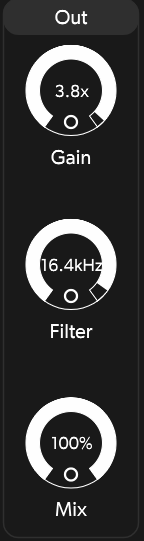
Output
After you have applied all of the above settings, you're in the home stretch. The final section is the "Output" section. Just choose your gain level, choose whether or not to apply an analogue-style two pole low-pass filter to the wet (processed) output, and then mix in however much of the dry signal you'd like!
Modulation System
Now that I had designed my preset, I was ready to dig into the most kickass part of any Unfiltered Audio Plugin: their flagship modulation system. This is the same system used on all of their other plugins, and they have perfected it to make it incredibly intuitive and fun to use. Just click on any output (the small circle found at the top right of a parameter), and then drag a virtual patch cable to the input of any other parameter (all other circles are inputs).
I added two signal generators in the modulation: a Saw/Tri LFO and a S+H Noise Generator. I fooled around with the settings until I was happy, and then patched them to modulate the "Slide" and "Pitch Shift" parameters, respectively. Once you start using the plugin in preview mode, you will see the values of those parameters changing with the introduced modulation.

My Presets
I created two robotic-sounding presets and named them "High Robot" and "Low Robot." Check them out below, and download them for free here.
Click here to download a 14-day free trial version of SpecOps (scroll all the way to the bottom of the page to find the installers and manual, or use the quick link button on the right).

My "High Robot" Preset

My "Low Robot" Preset
Conclusion
SpecOps by Unfiltered Audio is an incredibly powerful design tool that I'm ecstatic to have in my toolbox. This spectral processor allows the user to apply pre-made effects to specific frequency windows while also pitch shifting, adding compression, and creating feedback. Best of all, it integrates Unfiltered Audio's easy-to-use patchable modulation system. Using that, you can add various types of modulation to any other parameter in the plug-in. All together, the sound design possibilities are endless.